
DIY Wall Shelves with Scroll Brackets

Hello friends. Welcome to March. One month closer to warmer weather if you live on the east coast. As I sit here and listen to the sleet graze my windows, I am dreaming of tank tops and flip-flops. But until then I will have to just cozy up on the couch with some hot chocolate and maybe a dash of Bailey’s and type away.
Speaking of couches, last week I showed you my cute little sofa table that I made for behind our new couch. Now that I’ve put all of my energy into that one wall looking fantabulous, I’ve completely neglected the blank wall to right of it. I needed to do something about that immediately, it was eating me alive!! DIY’er problems!!

I knew I wanted some shelves there to fill in the space. Something that didn’t stick out too far or was too intrusive to the space. Some cute shelves with an interesting component is exactly what I wanted.
After perusing the Home Depot aisles endlessly for an unknown amount of time, I found these cute wooden scroll brackets in the area where you buy decorative wood trim. They come ready to paint, two in a pack, with screws and pre drilled on the back with the bracket already in place so they are ready to hang. They were a little more interesting to me than the brackets in the shelving department.

I debated over what I wanted to use for my actual shelf. Did I want a pre-fab shelf or wood cut down to size that you need to paint or stain. Now, normally I would choose wood any day however, I really wanted to get my shelves up and decorated that very same day. I’m a wee bit antsy when I have a project on my mind. So I went with Rubbermaid White Laminate shelves. Already finished and ready to go!!!

I decided to paint the scroll brackets a white color to match the shelves. I used a dry painting technique where you dip your brush in the paint and then blot it on a paper towel and then paint in all directions with quick strokes. It super easy and gives it that not so perfect “old-looking” finish that I was going for. I also decided to keep the inside of the scroll unpainted for a little extra depth. (I used Behr Polar Bear paint for these. This is the color of my trim work in my house so I always have some extra sitting around.)

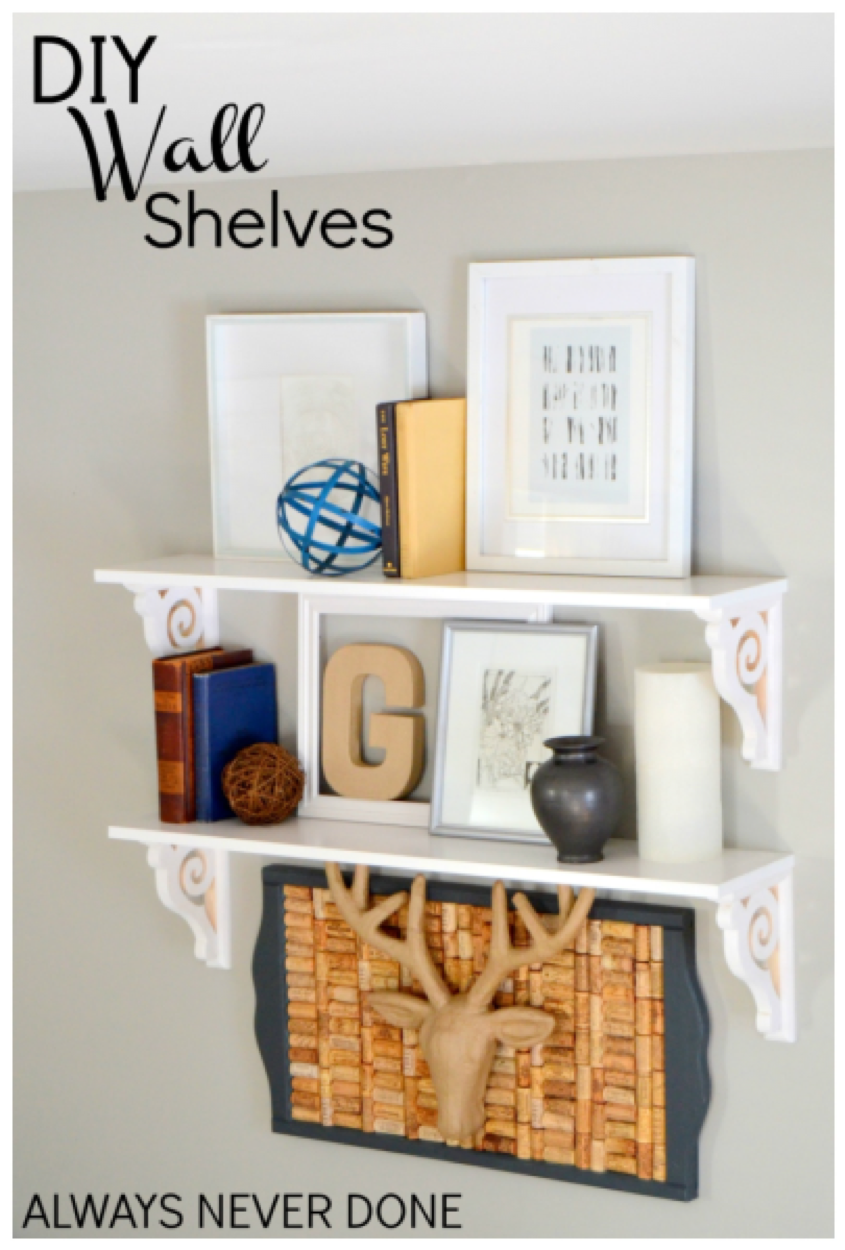
After those dried, I hung them on the wall on placed my laminate shelf boards on top. I would also recommend that you attach the shelves to the top of the brackets unlike I did. I was in a rush and wanted it decorated because we were having people over. But I plan on screwing them so there is no risk of the shelves moving.

Now it’s time to decorate. I grabbed lots of odds and ends that I had sitting around and in storage. It’s amazing what you can find in your own house isn’t it? The top two pictures are from minted.com and the picture on the second shelf is from Goodwill. All the picture frames are from Goodwill as well.
Everything else on the shelves came from second-hand shops or yard sales. Not even kidding folks!

The wine cork board was an old calendar holder that we glued old wine corks on the top and then painted the wooden frame to match our décor. I of course had to add the little deer head that I bought at AC Moore. I think it’s cardboard but I couldn’t resist it.


Now I can rest easy knowing that my lonely child of a wall has a purpose, even if it is just a trinket holder!!
Have a great week!