Steamer Trunk Restoration
Hello Friends! Hopefully all my north east readers are staying warm and cozy. We just experienced the biggest snowstorm in history here in Lancaster, PA. We are supposed to stay off the roads so I have been getting a ton of stuff done around the house including this post.
Have you ever come across one of those cool old steamer trunks? The ones with really cool hardware and old peeling pictures on the inside. I have and I didn’t really know what to do with it until a customer/friend of mine asked if could refinish one for them. A good challenge is something I will never turn down. So here we go!
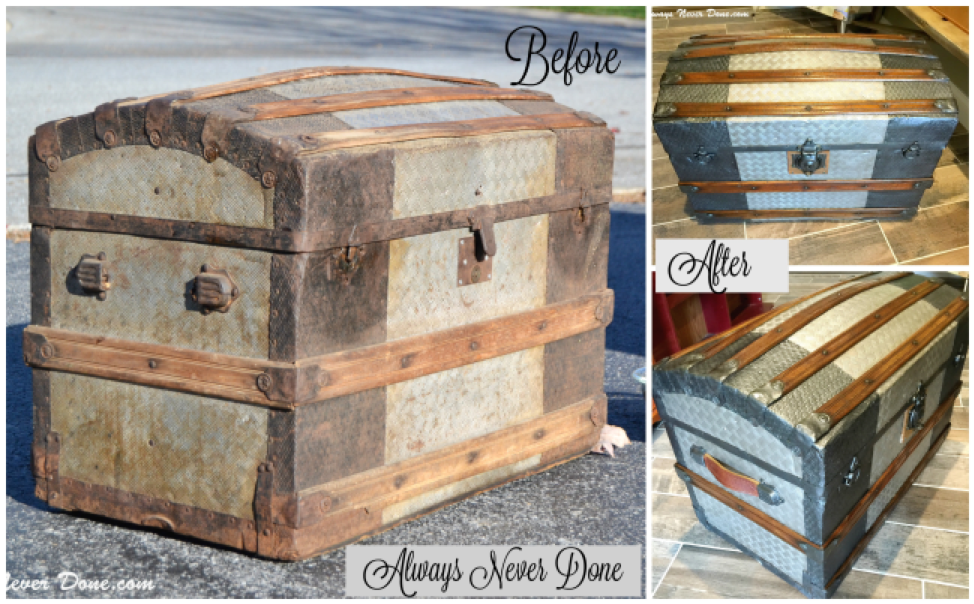
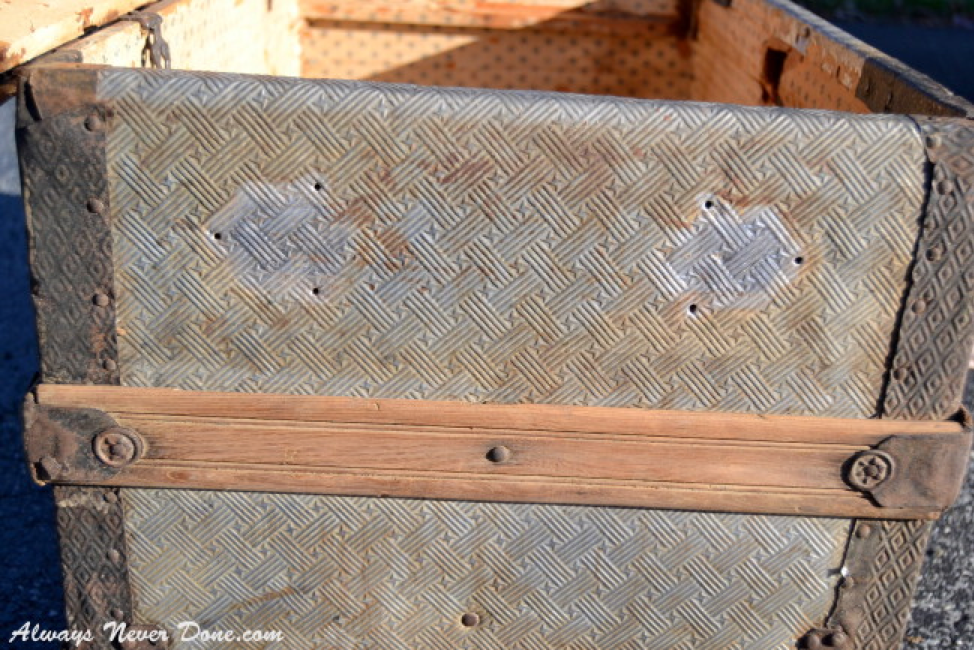
This is the trunk in the condition it was received. Can we say …rustic?!?

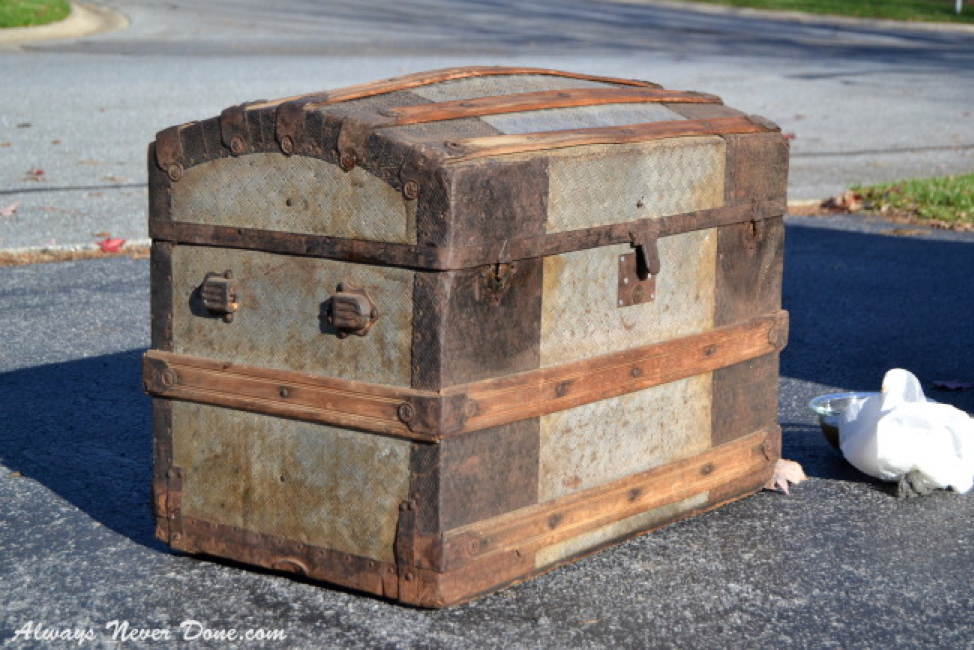
Nonetheless it was a really cool piece that I couldn’t wait to get my hands on. The only problem was I wasn’t exactly sure where to start or how to restore any of this. Don’t fret! Good old google searches and you tube came in handy. With the help of “Antique Trunks and Chests” on You tube and a few local people I got the job done and had such a fun time learning this.
The first thing I did was sand this whole bad boy down from top to bottom with a fine grit sponge and clean it really well with steel wool and warm vinegar water. (Be careful not to soak the wood slats on the exterior. The wood might warp). I had to change the water quite a few times as the trunk had collected quite a bit of dirt and grime over the years.
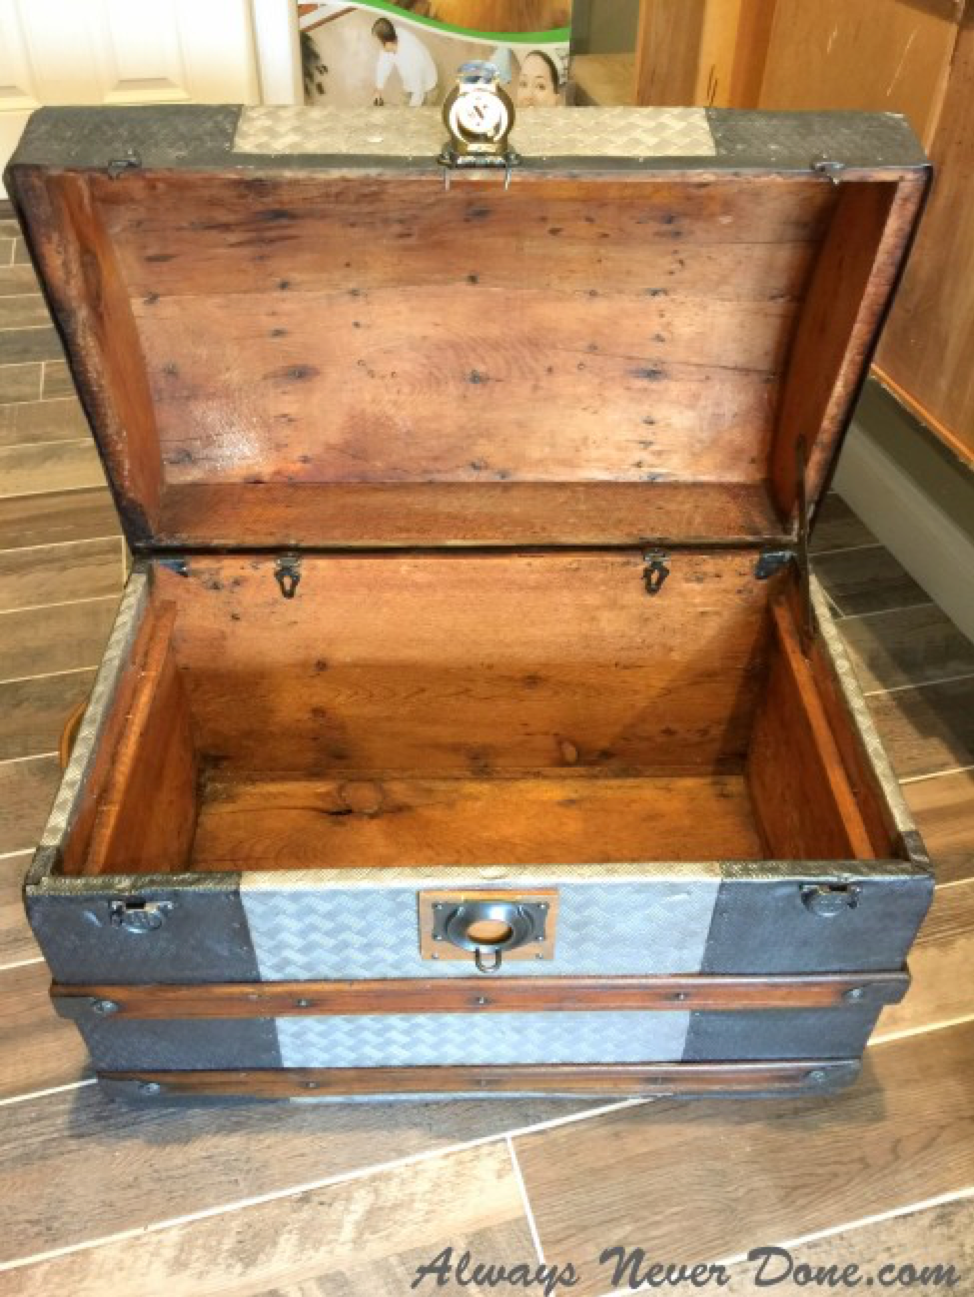
After the outside was semi clean, I worked on the inside. As you can see the inside was covered with half peeling paper. I found out the glue used to hold that paper in place was most likely a wheat paste which will soften and breakdown when dampened with water. I put vinegar water in a spray bottle and lightly sprayed the interior of the trunk. (the vinegar will also help get any lingering odors out of the trunk.) You want to be careful to not saturated the wood. The wood is very old and can warp if saturated by water. We don’t want any warping folks!
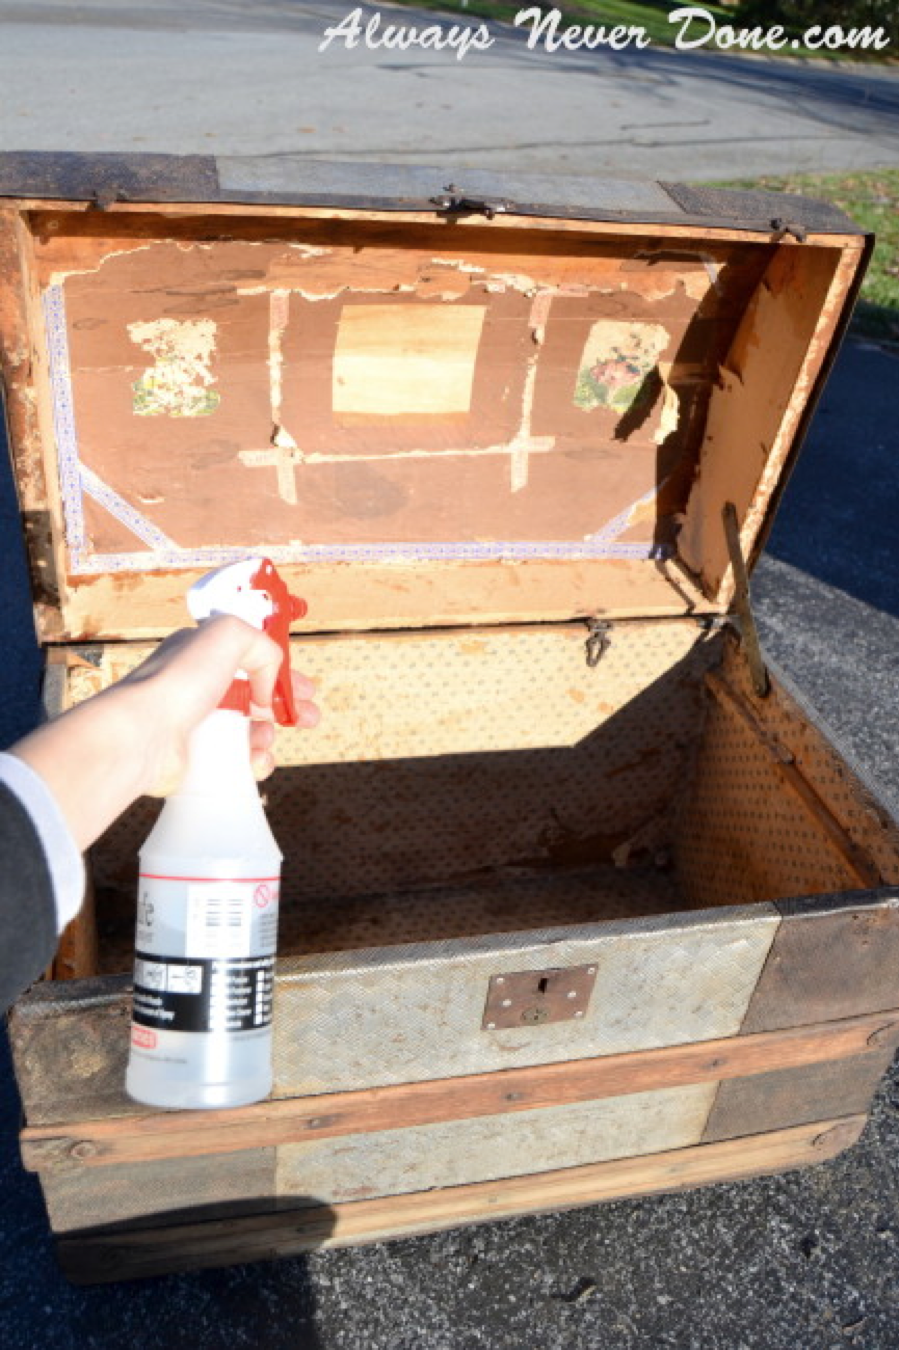
I used a scraper to scrape off the paper on the first go round and got off as much as I could. I didn’t get it all off so I did a second round of spraying and then used a grout cleaning brush to get the rest off. (the grout cleaning brush is supposed to be used in your bathroom but worked wonderfully for this project!)
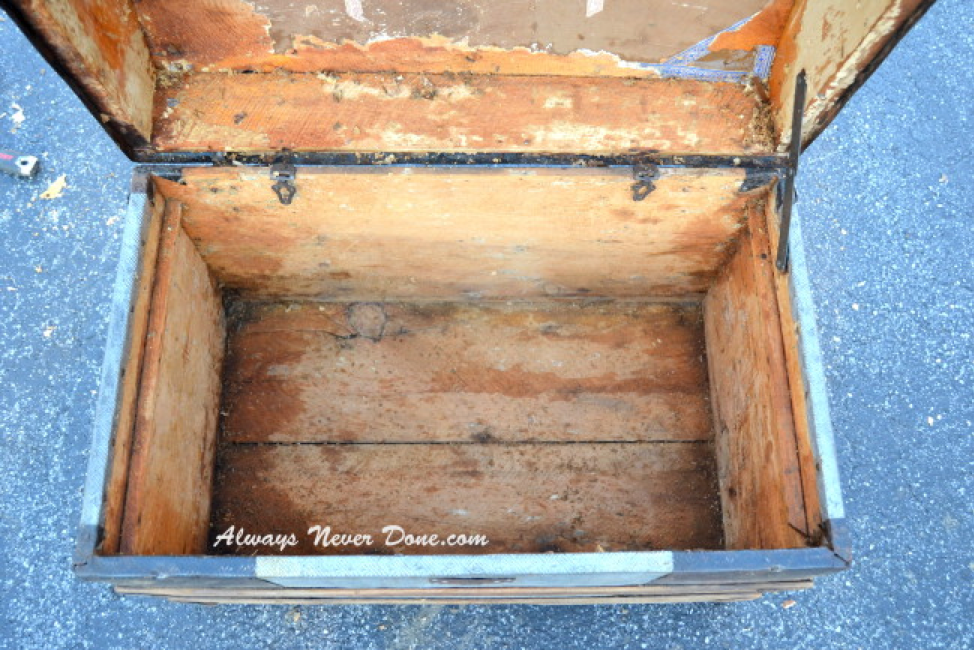

I let the trunk sit opened up and out in the sun for one day to dry out. The sun also helps get rid of any funky smells that might be left over too.
After the inside was completely dried out (about 24 hours later), I sanded the inside with a 100 grit sanding sponge to smooth everything out and get rid of any residual paper. They were a few exposed nails on the inside so I had to be extra careful when sanding around those buggers.
Now for the handles. This was something I had zero experience in doing, so I had to watch a you tube tutorial. It was easier than I expected. I had to go out and buy this little nail extracting tool and a little tiny hammer.

What you do is place the v side of the nail extractor down under the head of the nail as best as you can and tap the end of the handle with the hammer. The nail will start to come out. It’s super easy. Takes a few strikes of the hammer but it works like a charm, even on these wicked old nails.


What you do is place the v side of the nail extractor down under the head of the nail as best as you can and tap the end of the handle with the hammer. The nail will start to come out. It’s super easy. Takes a few strikes of the hammer but it works like a charm, even on these wicked old nails.
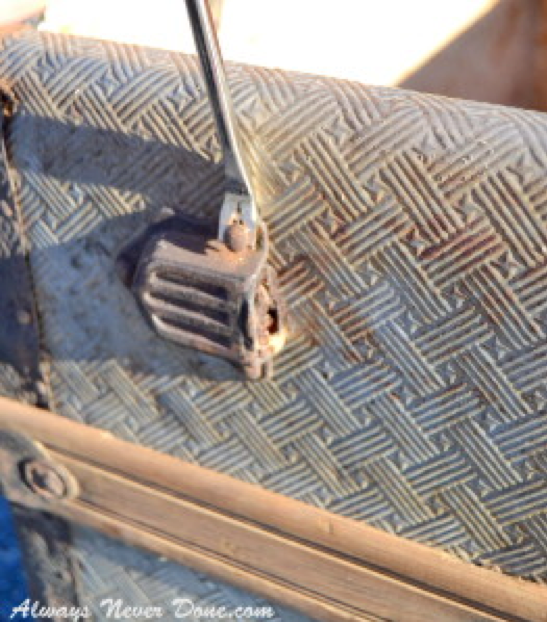
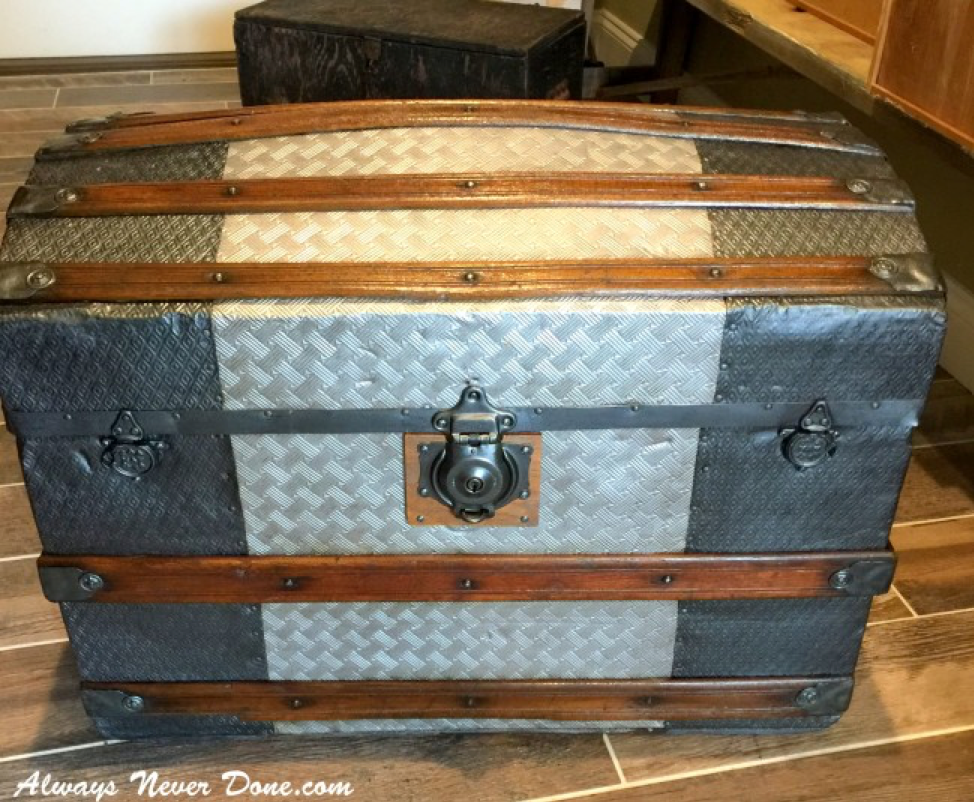
You can see what the original metal used to look like. This gave me a an idea of how to refinish the rest of the piece.
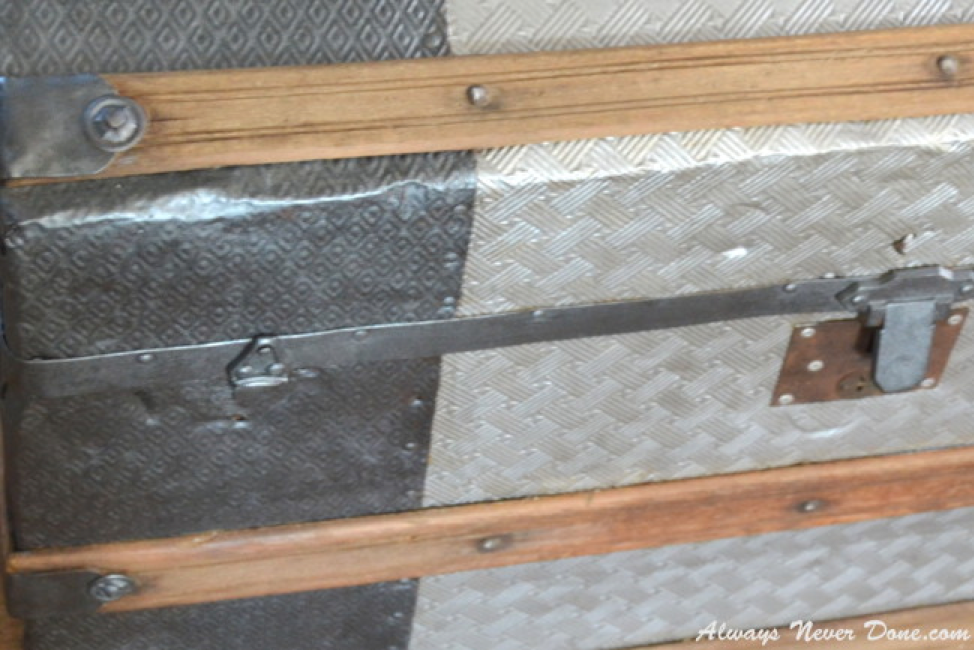
Now that the inside is all cleaned up and the handles are removed I am ready to go back to the exterior. My goal was to restore the piece to look original again. So I chose to use a metallic paint for the metal parts of the trunk. I chose Martha Stewart Crafts Multi Surface Metallic Acrylic Paint. I know what your thinking. Craft paint?? Believe me, this stuff is amazing. I use it all the time. It gives a nice metallic look without looking fake and it sticks to just about anything. I chose a brushed pewter and black nickel. I brushed 2 coats of the paint on the with a small flat craft brush. Letting them dry fully in between coats.

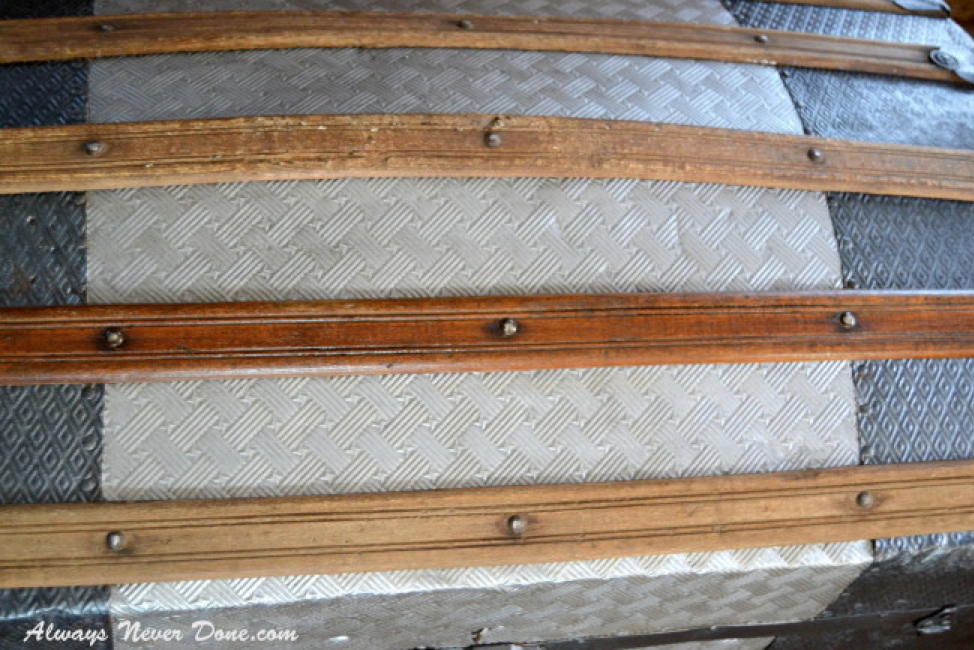
For the wood slats. I chose Rust-o-leum wood stain in Golden Oak. I took an old t-shirt cut up and wiped the stain on carefully. One coat was perfect! After the stain was completely dry I put one coat of Spar Urethane in satin over the wood slats to protect them and give them a nice shine. (You can see the second slat from the bottom looks richer than the rest. This shows you what a little stain can do.)
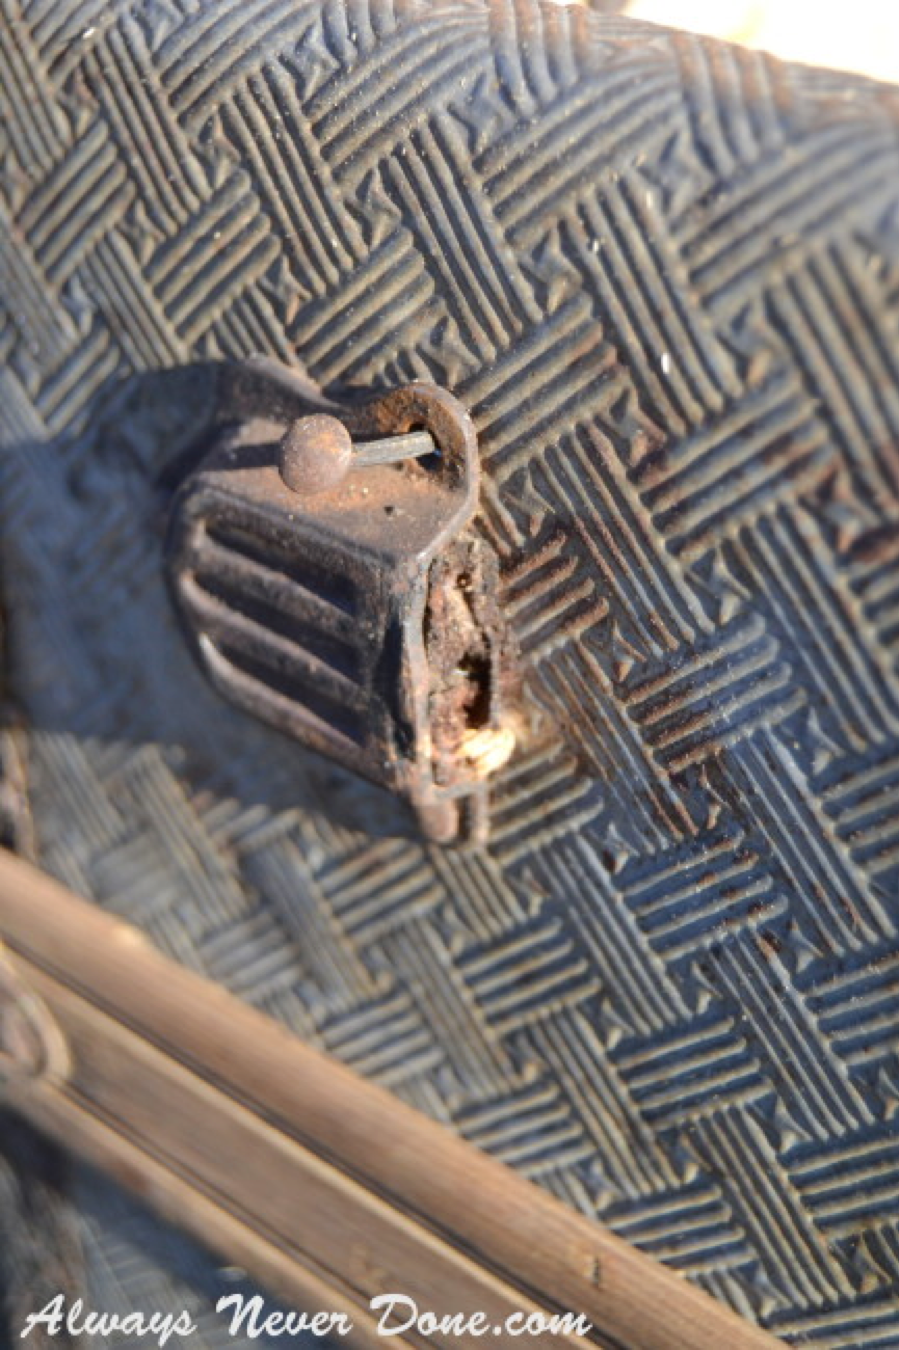
Now to put the handles back on. I salvaged the hardware because it was in excellent condition however I needed to order new leather straps. If you recall this is what they looked like before. Virtually no strap left!


I drilled 3 holes in the end of the leather handles and then into the side of the trunk and attached the handles with small screws to give the handles extra support when lifting the trunk.
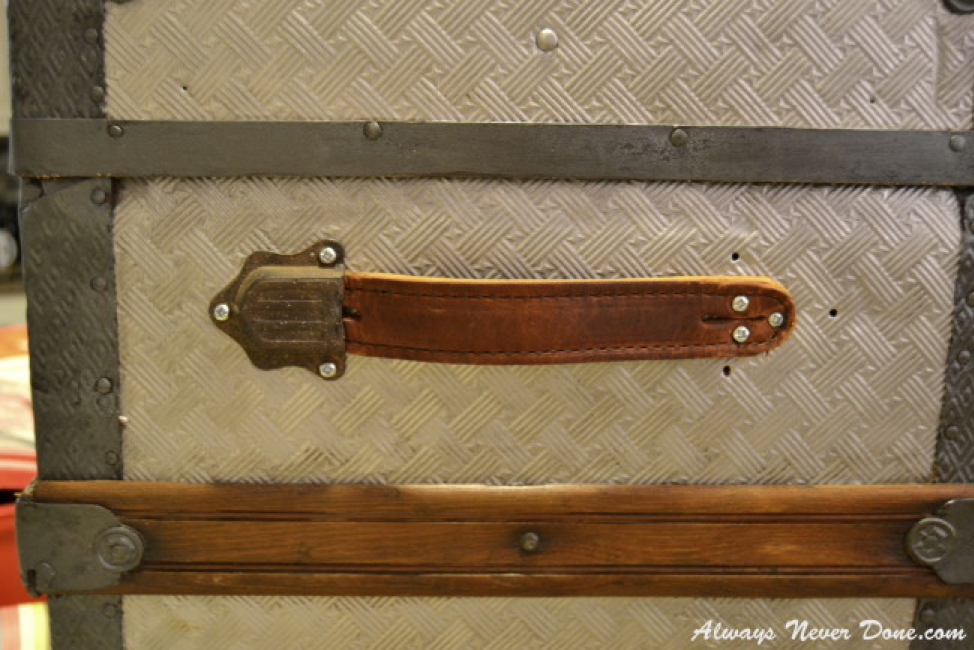
I then replaced the hardware over the handles and used new screws to keep them in place. I will paint over the nails to make them match the hardware better as well.
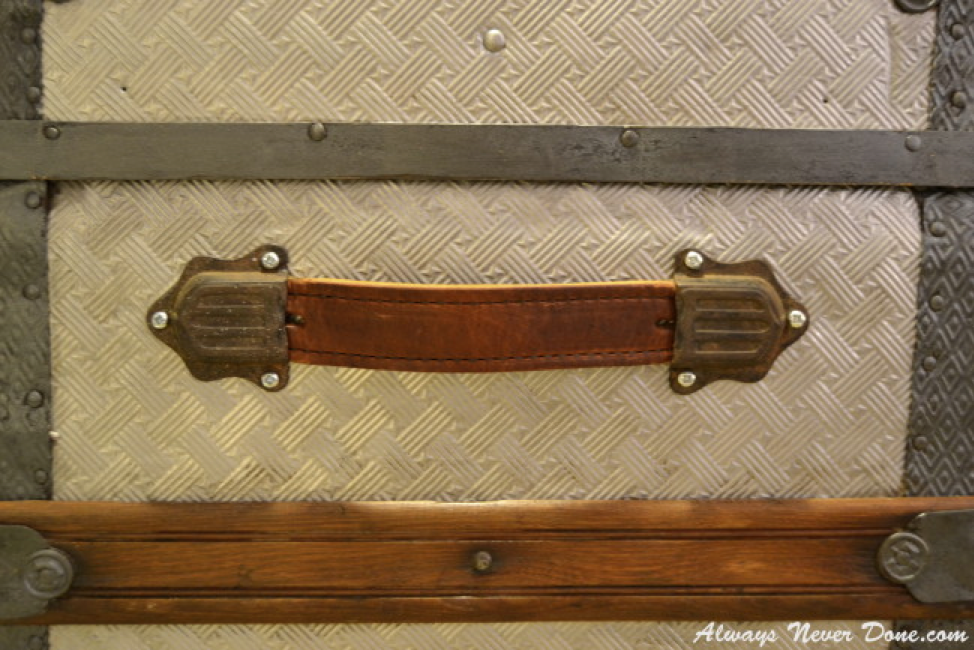
Now I have an extremely sturdy handle that looks great.
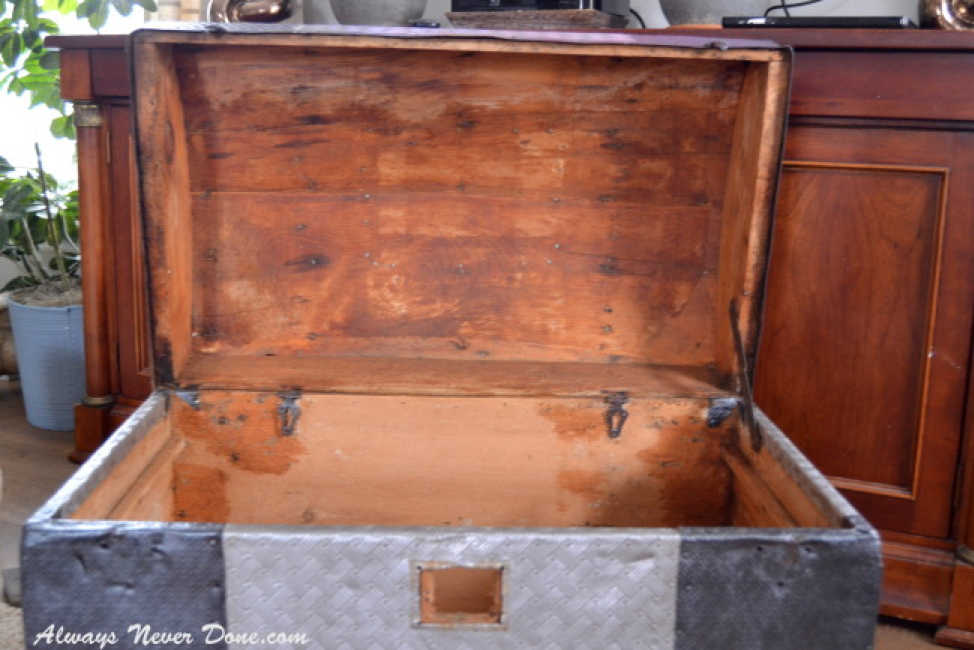
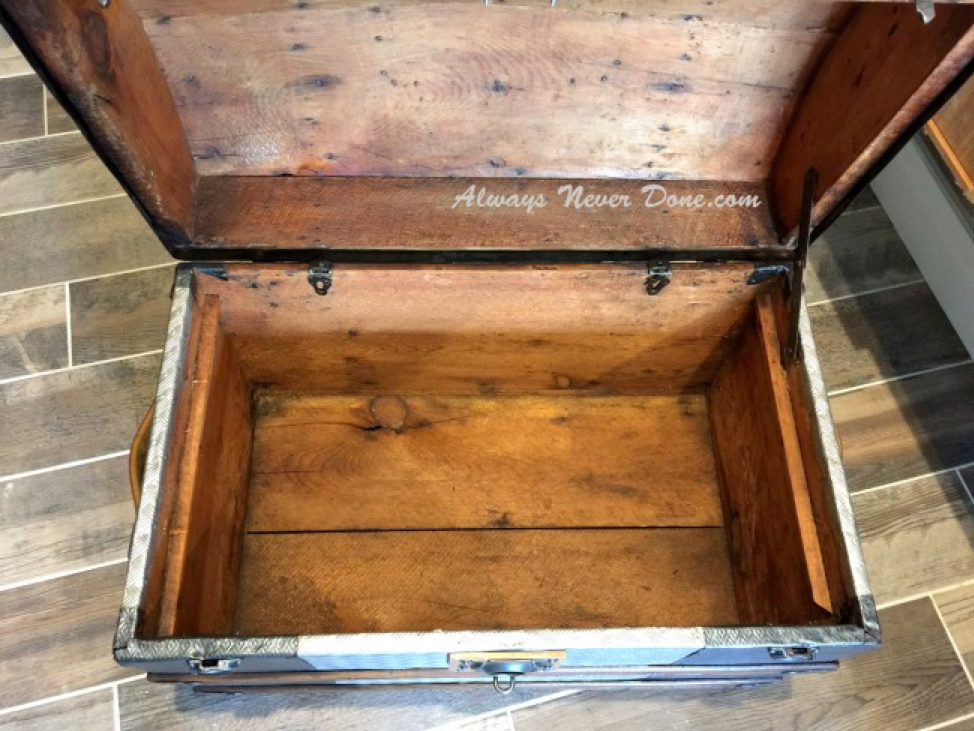
For the inside of the trunk I brushed on a coat of waterlox sealer in satin which penetrates the wood and seals it. I chose to leave it natural looking because the wood inside had so much character.

The last thing I needed to do was replace the latch on the front. It was missing the bottom part of the latch so it didn’t close properly. I again used Brettuns Village to order a new lock. These were my color choices. I ended picking the middle one and painting it myself.

I had to create little wooden landing area for the bottom part of the lock to be attached but other than that it was a simple replacement. I painted the lock set the darker of the two colors used on the trunk so that it too would match.

It’s all done. This project took me quite some time because I was learning as I went and some areas were very tedious. I happen to love tedious work so this was right up my alley. I was so proud of myself when I was done I offered to do my in-laws old trunk for them too!